Procedural Venice: Difference between revisions
Hangqian.li (talk | contribs) |
Hangqian.li (talk | contribs) |
||
| (20 intermediate revisions by the same user not shown) | |||
| Line 34: | Line 34: | ||
In this specific project, most Venetian buildings (except for some landmark buildings such as churches and palaces), can also be automatically generated using the procedural method because from the visual perspective, they share the same construction pattern. Using the procedural generating method will save a lot of work and cost for quickly testing and iteration the scenarios. Another important reason is that the built-in architecture node in Houdini is still in the beta testing phase and only provides very limited parameters. What’s more, it lacks the functions for generating roofs and windows, which are both essential in procedural Venice. We also find that a large number of inner nodes makes the customizing become difficult and slows the cooking speed. So it will help a lot if we can have our generating pipeline. | In this specific project, most Venetian buildings (except for some landmark buildings such as churches and palaces), can also be automatically generated using the procedural method because from the visual perspective, they share the same construction pattern. Using the procedural generating method will save a lot of work and cost for quickly testing and iteration the scenarios. Another important reason is that the built-in architecture node in Houdini is still in the beta testing phase and only provides very limited parameters. What’s more, it lacks the functions for generating roofs and windows, which are both essential in procedural Venice. We also find that a large number of inner nodes makes the customizing become difficult and slows the cooking speed. So it will help a lot if we can have our generating pipeline. | ||
==Methodology== | |||
===Classification of Venetian buildings=== | |||
Correctly classifying Venetian buildings is very important in this project. Using Google map of Venice, pictures on Google, we classify Venetian buildings into 3 types, which are churches, simplified normal buildings, and palaces (as the pictures below). For churches and palaces, due to their sophisticated design, they have more features and types than simplified normal buildings. Especially for churches, because of its uniqueness, procedural modeling is of little significance compared to manually modeling. After considering the technical difficulties and workload, we decided to focus on simplified Venetian buildings. | |||
Venetian building types: | |||
*Churches (Need to model manually because of the uniqueness of the church) | |||
{| class="wikitable" style="margin: 1em auto 1em auto;" | |||
| [[File:church.png|none|thumb|450px| Different types of churches in Venice]] | |||
|} | |||
*Palaces | |||
{| class="wikitable" style="margin: 1em auto 1em auto;" | |||
| [[File:palaces.png|none|thumb|450px|Different types of palaces in Venice]] | |||
|} | |||
*Simplified buildings | |||
{| class="wikitable" style="margin: 1em auto 1em auto;" | |||
| [[File:simplified_buildings.png|none|thumb|450px|Different types of simplified buildings in Venice]] | |||
|} | |||
We can see that compared with palaces, simplified buildings have regular cubic shapes. The roofs are mostly sloping roofs with chimneys. The windows are simpler than palaces, and there are fewer windows with carved rails. Simplified Venetian style buildings has different components. We can classify them through texture(color, wall damages), chimneys, windows, doors. | |||
== | Different component types: | ||
*Windows | |||
{| class="wikitable" style="margin: 1em auto 1em auto;" | |||
| [[File:windows.jpeg|none|thumb|450px|Different types of windows in Venice]] | |||
|} | |||
*Chimneys | |||
{| class="wikitable" style="margin: 1em auto 1em auto;" | |||
| [[File:chimney.png|none|thumb|450px|Different types of chimneys in Venice]] | |||
|} | |||
*Roofs | |||
{| class="wikitable" style="margin: 1em auto 1em auto;" | |||
| [[File:roof.jpeg|none|thumb|450px|Different types of roofs in Venice]] | |||
|} | |||
===Building generator=== | |||
The main goal of this generator is to extracted footprint information of average buildings in Venice, convert it to stereo models, and expose custom parameters as many as possible. As such, the pipeline can be concluded by the following steps: | |||
* Take the input of footprint and convert it to primitive type as base primitive. Resort the point number to clockwise order if needed. | |||
* Make a few copies of the base primitive and assign floor height attributes. | |||
* Transform all the primitives by their height attribute. Compute the normal if needed. Then we get the primitives of floors. | |||
* Resample the edges of all the primitives. For each primitive, we start from the first point and sample along the direction to the next point. Recall that we have sorted the points to make sure the sampling process will follow the same direction among different floors. | |||
* After sampling, we add a new primitive according to the result points on each floor. And then delete the original floor primitive to avoid overlapping. | |||
* For each floor, add window units between neighboring points. It’s crucial to form points to these primitives or faces in the clockwise order to keep the normals uniform. | |||
* At last, we can set the point group as anchors to mark the position of windows. After that, we can easily copy window models to the anchors with the built-in “Copy to points” node. | |||
{| class="wikitable" style="margin: 1em auto 1em auto;" | |||
| [[File:building_generator.png|none|thumb|300px|Building generator]] | |||
|} | |||
===Roof generator=== | |||
As we can observe, the most common roof type in Venice are the “hip roof” where all sides slope downwards to the walls without any vertical sides. There are also a few gable roofs and flat roofs. However, they are not that obvious at the first glance. | |||
'''Hip roof''' | |||
It’s said that hip roofs are more challenging to construct than gable roofs for they require advanced architecture knowledge. Fortunately, in Houdini, there is a built-in node called “PolyExpand2D” which can offset each vertex (not point) along the average direction of the adjacent edges. It is enough for locating the external corners and internal corners, by which ridges of the roofs can be generated. This node can build inside or outside geometry according to the given distance from a planar graph of connected polylines. With this convenient node, we can construct the hip roof by the following steps: | |||
* Take the input of footprint and convert it to primitive type as base primitive. Resort the point number to clockwise order if needed. | |||
* Generate inner edges for roof ridges, external corners, and internal corners by using the “PolyExpand2D” node. Create an “edgedist” vertex attribute with the distance of each vertex from the original polyline that generated it. | |||
* Promote “edgedist” attribute from the vertex level to point level. Then lift the points according to the “edgedist” attribute. This step results in the base shape of the hip roof. | |||
* Next we need to spread the tiles on each face of the roof. We follow the idea of sampling in texture coordinate, that is to say, we lay the roof tiles along the XZ plane as the “tile coordinate”, and transform each face of the roof to this coordinate. During this process, the transformation matrix needs to be stored. In this case, we use quaternion to do the rotation to avoid Gimbal Deadlock problem. Then, the boolean operation is executed to cut the extra parts of the marginal tiles. At last, we can rotate everything back using the invert of quaternion to put the roof face and tiles on it to the original position. | |||
* Then it comes to the tiles on the ridges and external corners. Resample the filtered edges by a reasonable unit to generate target points of copying tiles. Note that internal corners can be obsoleted by the cross product of the adjacent edges. | |||
'''Gable roof''' | |||
{|class="wikitable" | The only difference between hip roofs and gable roofs is that triangular faces of gable roofs are vertical. So we need to eliminate the triangular faces and deform them to be vertical. Considering the issue that after deforming, the related points need to keep coplanarity as well as the points on adjacent faces, it’s just a matter of mathematics. | ||
{|class="wikitable" style="margin: 1em auto 1em auto;" | |||
| [[File:roof_type1.png|none|thumb|x200px|Fence-roof generator]] | |||
|- | |- | ||
| | | [[File:roof_1.png|none|thumb|x200px|Hip-roof generator]] | ||
| | |} | ||
'''Roof details''' | |||
We used the 3D modeling software Maya to build some chimney models and exported the FBX file to Houdini. A certain density of points can be randomly generated on the plane of the roof of the house so that the chimney with the normal upward is assisted on the corresponding point. | |||
{|class="wikitable" style="margin: 1em auto 1em auto;" | |||
|- | |- | ||
| | | [[File:chimney_2.png|none|thumb|x150px|chimney model 1]] | ||
| | | [[File:chimney_1.png|none|thumb|x150px|chimney model 2]] | ||
|} | |||
===Window generator=== | |||
As the implementation of fences, glasses and shutters are quite straightforward, so we will focus on the arch generator in this part. | |||
'''Arch generator''' | |||
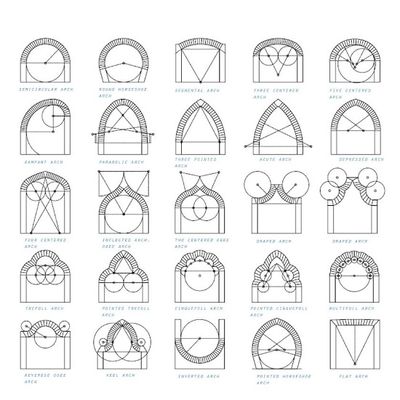
The elegant arches are generated by the designed geometry relationship. So it’s natural to think of utilizing the boolean operation to get the arches. | |||
{|class="wikitable" style="margin: 1em auto 1em auto;" | |||
|- | |- | ||
| | | [[File:window_add.jpeg|none|thumb|400px|x400px|Arches]] | ||
| | |} | ||
However, there is a significant problem to consider. Every modeling software treats a circle as a combination of multiple segments of straight lines. So if we use the boolean operation to calculate the intersection point of two tangent circles, we won’t get the expected result with high probability. Even if we subdivide the two circles many times, the boolean may do not work either due to the float precision. Besides, if we get the intersection finally, we will still be struggling with the point order issue which is vital for generating neat faces and correct normals. | |||
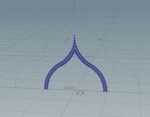
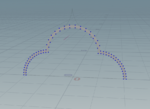
In a word, it’s necessary to control every detail by ourselves. We implemented a set of methods in vex code, which can calculate the position of the intersection, scatter points to a specific arc in both clockwise and anticlockwise directions, and form primitives accordingly. To generate a specific arch, we just need to figure out the intersections of circles, the start angles and end angles for each segment, and the direction for scattering. Please note that the inner shape and outer shape of an arch are not the same and thus they can’t be scaled or expanded to each other directly. It’s still necessary to write code to form the other shape. | |||
{|class="wikitable" style="margin: 1em auto 1em auto;" | |||
|- | |- | ||
| | | [[File:window_1.png|none|thumb|150px|x150px|Window generator type 1]] | ||
| | | [[File:window_2.png|none|thumb|150px|x150px|Window generator type 2]] | ||
| [[File:window_3.png|none|thumb|150px|x150px|Window generator type 3]] | |||
| [[File:window_4.png|none|thumb|150px|x150px|Window generator type 4]] | |||
|- | |- | ||
| | | [[File:window_5.png|none|thumb|150px|x150px|Window generator type 5]] | ||
| | | [[File:window_6.png|none|thumb|150px|x150px|Window generator type 6]] | ||
| [[File:window_7.png|none|thumb|150px|x150px|Window generator type 7]] | |||
|} | |||
{|class="wikitable" style="margin: 1em auto 1em auto;" | |||
|- | |- | ||
| | | [[File:window_ge1.png|none|thumb|x300px|Hollow mode and Wire mode]] | ||
| | | [[File:window_ge2.png|none|thumb|x300px| Fill mode and Face mode]] | ||
|} | |||
'''Modeling using Maya''' | |||
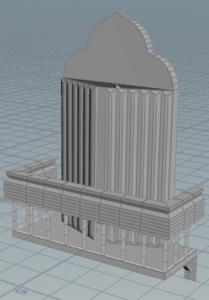
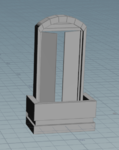
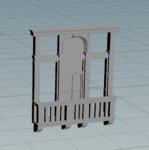
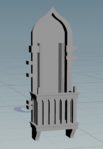
We also used the Maya modeling software to model the Venetian windows then import it into the Houdini engine. The advantage of this method is that it is relatively straightforward and we can use the Maya for complex window structures. However, the disadvantage is that there are not many variables that can be programmed and automatically controlled. | |||
{|class="wikitable" style="margin: 1em auto 1em auto;" | |||
|- | |- | ||
| | | [[File:window1.png|none|thumb|150px|x150px|Window model 1]] | ||
| | | [[File:window2.png|none|thumb|150px|x150px|Window model 2]] | ||
| [[File:window3.png|none|thumb|150px|x150px|Window model 3]] | |||
| [[File:window4.png|none|thumb|150px|x150px|Window model 4]] | |||
| [[File:window5.png|none|thumb|150px|x150px|Window model 5]] | |||
|} | |||
===Venice city generator=== | |||
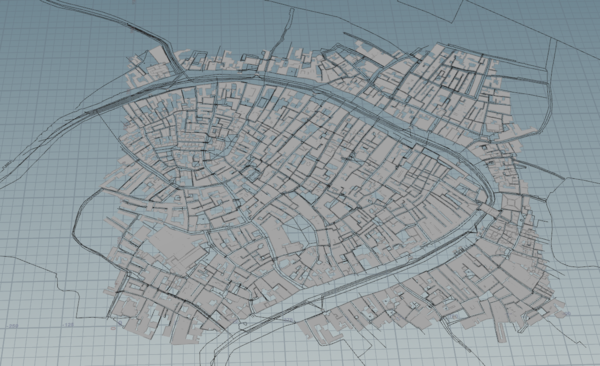
[https://en.wikipedia.org/wiki/OpenStreetMap. OpenStreetMap] of Venice is used as a reference to pinpoint the location of every building. Using the sideFX Labs tools, the Venice city buildings' locations could be pinpointed in Houdini, and the street information and building inner parts are filtered using OSM filter node. Because there are some overlaps between different surfaces, so we add a boolean node and union the overlap surfaces. | |||
{| class="wikitable" style="margin: 1em auto 1em auto;" | |||
| [[File:osms.png|none|thumb|600px|Venice OSM data]] | |||
|} | |||
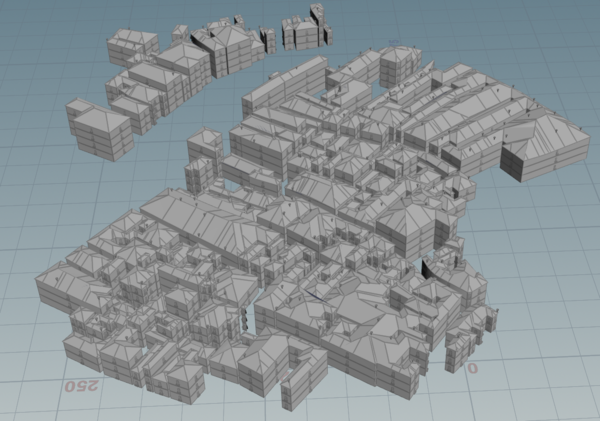
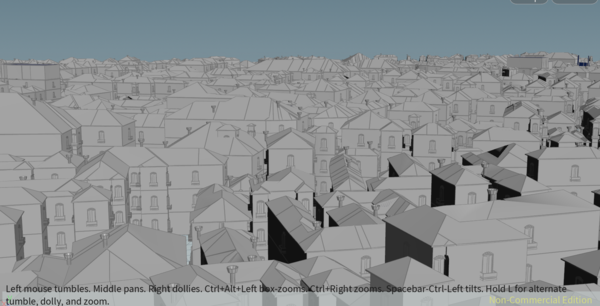
In this step, we connect the OSM data to our building generators. First, we traverse all OSM surfaces and use each OSM surface as the bottom surface to reconstruct the building generator. All OSM surfaces are separated into individual small surface, and a single building is generated on the small surface specifically, the height of the building and the height of the roof bottom are given the same random height. | |||
{| class="wikitable" style="margin: 1em auto 1em auto;" | |||
| [[File:venice_city_model.png|none|thumb|600px|Bird view of Venice]] | |||
|- | |- | ||
| | | [[File:citynear.png|none|thumb|600px|Bird view of Venice]] | ||
| | |||
| | |||
| | |||
|- | |- | ||
| [[File:heighttwo.png|none|thumb|600px|Different height of houses]] | |||
|} | |} | ||
| Line 268: | Line 348: | ||
|} | |} | ||
*Window options: Sets the concrete position of window units. | |||
{|class="wikitable" | |||
!scope="col" width="100"|Parameter | |||
!|Overview | |||
{| class="wikitable" | |||
| | |||
| | |||
|- | |- | ||
| | |Height | ||
|Controls the height of the main body of windows. | |||
|- | |- | ||
| | |Separation ratio | ||
| | |Controls the position of sliding windows. | ||
|- | |- | ||
| | |Shutter options | ||
|Adjusts the rotation angles of the shutters and the distribution of leaves. | |||
| | |||
|} | |} | ||
*Fence options: most of the parameters can be found in fence generators. | |||
==Quality Assessment== | ==Quality Assessment== | ||
| Line 469: | Line 456: | ||
We did not think about the dilapidated problem when we actually modeled. Actually, many tiles in Venice buildings are damaged, many walls are worn, many bricks are missing, and many chimneys are damaged. The houses we generated are too clean, too tidy, no clothesline, no flower baskets, no breath of life, and lack of traces of yeas. | We did not think about the dilapidated problem when we actually modeled. Actually, many tiles in Venice buildings are damaged, many walls are worn, many bricks are missing, and many chimneys are damaged. The houses we generated are too clean, too tidy, no clothesline, no flower baskets, no breath of life, and lack of traces of yeas. | ||
==Project Plan and Milestones== | |||
*<span style=color:green>Finished: Finshed as planed</span> | |||
*<span style=color:red>Delayed: Not finished as planed</span> | |||
*<span style=color:gray>Changed: Replaced by other method or abandoned</span> | |||
{|class="wikitable" | |||
!scope="col" width="100"|Date | |||
!|Task | |||
|- | |||
|By Week 4 | |||
| | |||
* <span style=color:green>Collect information for the Procedural city generator and GAN painting generator.</span> | |||
* <span style=color:green>Prepare for the project kick-out slides.</span> | |||
|- | |||
|By Week 5 | |||
| | |||
* <span style=color:green>Discuss with TA the implementation plan of procedurally generated Venice</span> | |||
* <span style=color:green>Obtain the original TA's method and engineering files of the procedural Venice.</span> | |||
* <span style=color:green>Read books about architecture and start to use Google Maps to classify Venice architecture.</span> | |||
|- | |||
|By Week 6 | |||
| | |||
* <span style=color:green>Completed the basic classification of Venetian architecture.</span> | |||
* <span style=color:green>Determined the classification of simplified Venetian buildings, palaces, and complex churches.</span> | |||
* <span style=color:green>Distinguished and classified various components in simplified Venetian buildings and palaces.</span> | |||
|- | |||
|By Week 8 | |||
| | |||
* <span style=color:green>learned the TA's city generator.</span> | |||
* <span style=color:green>learned the Houdini Basic operation and programming.</span> | |||
* <span style=color:green>Made some basic demos following the tutorial on youtube.</span> | |||
|- | |||
|By Week 10 | |||
| | |||
* <span style=color:green>Create simplified building creators using Houdini.</span> | |||
* <span style=color:green>Create a basic roof generator.</span> | |||
* <span style=color:gray>Create city generator with SideFX Labs tools.</span> | |||
<span style=color:gray>(We didn't use this method because we think it is difficult to make Venetian style building roof using this method)</span> | |||
|- | |||
|By Week 11 | |||
| | |||
* <span style=color:green>Use Maya to build some windows and chimneys, import them in Houdini.</span> | |||
* <span style=color:green>Add more details to the basic roof generator( including add vertical roof structure, tiles, chimneys, attic).</span> | |||
* <span style=color:green>Solve the problem that the lab OSM node cannot connect to the self-written building generator.</span> | |||
* <span style=color:green>Create the basic city generator.</span> | |||
* <span style=color:green>Create a basic wall generator, with window models.</span> | |||
* <span style=color:green>Create another fence style roof generator.</span> | |||
|- | |||
|By Week 12 | |||
| | |||
* <span style=color:green>Improve the building generator, which could adjust building height, windows num etc.</span> | |||
* <span style=color:green>Random assign the building height in the city generator.</span> | |||
* <span style=color:green>Implement web using Streamlit python package, deep learning method will be used on the web.</span> | |||
* <span style=color:gray>input to Unreal and make a short video about the final scene </span> | |||
<span style=color:gray>(Abandoned because we want to focus on Houdini modeling generator, importing to Unreal might face new conflict and Unreal5 which comes next year will be much more powerful than Unreal4)</span> | |||
|- | |||
|By Week 13 | |||
| | |||
* <span style=color:green>Push the models and engineering file to the GitHub.</span> | |||
* <span style=color:green>Finish the report.</span> | |||
* <span style=color:green>Testing</span> | |||
* <span style=color:gray>Video</span> | |||
<span style=color:gray>(Abandoned because we do not import it into Unreal 4 Engine)</span> | |||
|- | |||
|By Week 14 | |||
| | |||
* <span style=color:green>Final Presentation</span> | |||
|- | |||
|} | |||
==Github Link== | ==Github Link== | ||
Latest revision as of 14:00, 16 December 2020
Venetian buildings are the gems of the history of architecture, attracting researchers to explore the trajectory of style evolution assiduously. Meanwhile, lots of artists also drown themselves in recreating these architectures by various works of art to enhance the sense of immersion and reality. Because of the centuries of development and cultural communication, Venice architecture has formed its unique style, which absorbed the symbolic features of Gothic, Byzantine, Renaissance, and Baroque styles, making it almost impossible to identify only one style on the existing building. These architectural elements collaborate and are always in harmony even they came from very different ages. Maybe that's one of the reasons that in recent years, we have seen many movies and computer games whose settings are in Venice cause a stir, for it usually requires a prodigious amount of work to replicate common Venetian architectures, not to mention the complex palaces and churches.
In this project, to experiment with a more efficient way of creating the rough buildings and even the city by a procedural modeling way, we propose a building pipeline that can handle any shape of footprints and generate a reasonable simple building. It’s noted that manual work on details is still necessary to create a more realistic model. Otherwise, we may get lost in adjusting every little thing while programming the procedural method.
Introduction
Procedural modeling is an umbrella term for several techniques in computer graphics especially in geometry processing to create 3D models by sets of rules. In this project, we are going to randomly generate the Venice building models and provide users with convenient controllers as many as possible using Houdini, with VEX scripts and some visualized nodes. Our project will mainly focus on the shape part of the average building in Venice but not the landmarks which usually require special attention while modeling.
The general pipeline uses a top-down approach and can be extended from each part. The detailed description is as follows:
- City generator: creates part of city automatically.
- Footprint generator: interprets the OSM data, which contains the geospatial information of the location of Venice buildings, and randomly creates the rough shapes of buildings.
- Building generator: decides the distribution of floors and windows for one building, as well as the top-level settings of the accessories.
- Roof generator: calculates the shape of roof of the given type and lay roof tiles accordingly. For a flat roof, arrange the distribution and shape of the handrail.
- Window generator: assembles a single-window by controlling the parameters of arch, window size, shutters, and fences.
With all generator tools, we can model and iterate the base low-poly building quickly.
Motivation
The creation of compelling models is a crucial task in the development of successful movies and computer games. However, modeling large three-dimensional environments, such as Venice city, is a very expensive process and can require several years' worth of labor. Fortunately, industries have come up with several procedural modeling methods to speed up the process and Houdini is one of the most popular tools.
In this specific project, most Venetian buildings (except for some landmark buildings such as churches and palaces), can also be automatically generated using the procedural method because from the visual perspective, they share the same construction pattern. Using the procedural generating method will save a lot of work and cost for quickly testing and iteration the scenarios. Another important reason is that the built-in architecture node in Houdini is still in the beta testing phase and only provides very limited parameters. What’s more, it lacks the functions for generating roofs and windows, which are both essential in procedural Venice. We also find that a large number of inner nodes makes the customizing become difficult and slows the cooking speed. So it will help a lot if we can have our generating pipeline.
Methodology
Classification of Venetian buildings
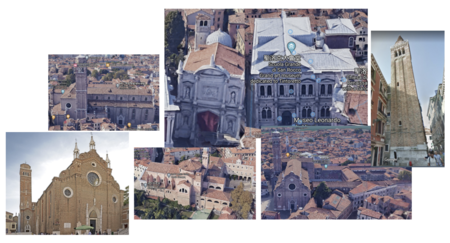
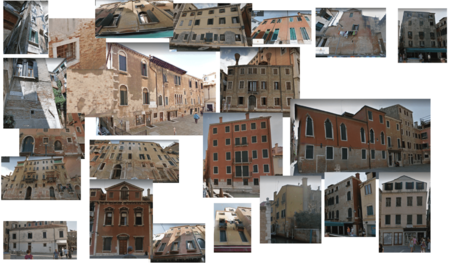
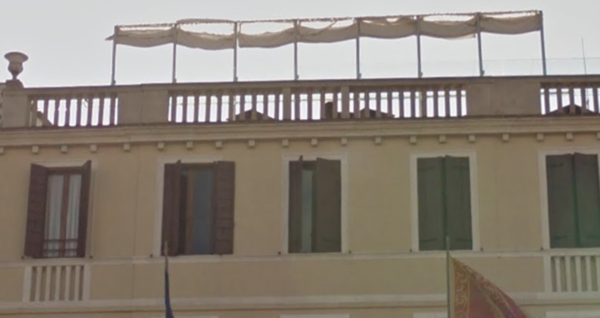
Correctly classifying Venetian buildings is very important in this project. Using Google map of Venice, pictures on Google, we classify Venetian buildings into 3 types, which are churches, simplified normal buildings, and palaces (as the pictures below). For churches and palaces, due to their sophisticated design, they have more features and types than simplified normal buildings. Especially for churches, because of its uniqueness, procedural modeling is of little significance compared to manually modeling. After considering the technical difficulties and workload, we decided to focus on simplified Venetian buildings.
Venetian building types:
- Churches (Need to model manually because of the uniqueness of the church)
- Palaces
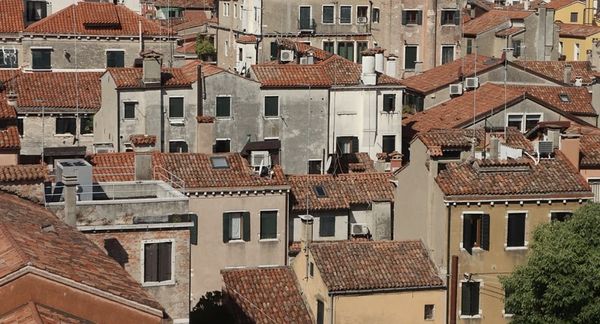
- Simplified buildings
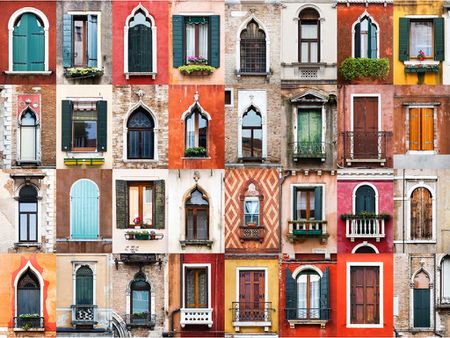
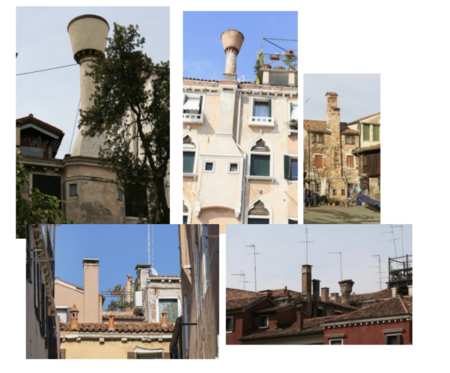
We can see that compared with palaces, simplified buildings have regular cubic shapes. The roofs are mostly sloping roofs with chimneys. The windows are simpler than palaces, and there are fewer windows with carved rails. Simplified Venetian style buildings has different components. We can classify them through texture(color, wall damages), chimneys, windows, doors.
Different component types:
- Windows
- Chimneys
- Roofs
Building generator
The main goal of this generator is to extracted footprint information of average buildings in Venice, convert it to stereo models, and expose custom parameters as many as possible. As such, the pipeline can be concluded by the following steps:
- Take the input of footprint and convert it to primitive type as base primitive. Resort the point number to clockwise order if needed.
- Make a few copies of the base primitive and assign floor height attributes.
- Transform all the primitives by their height attribute. Compute the normal if needed. Then we get the primitives of floors.
- Resample the edges of all the primitives. For each primitive, we start from the first point and sample along the direction to the next point. Recall that we have sorted the points to make sure the sampling process will follow the same direction among different floors.
- After sampling, we add a new primitive according to the result points on each floor. And then delete the original floor primitive to avoid overlapping.
- For each floor, add window units between neighboring points. It’s crucial to form points to these primitives or faces in the clockwise order to keep the normals uniform.
- At last, we can set the point group as anchors to mark the position of windows. After that, we can easily copy window models to the anchors with the built-in “Copy to points” node.
Roof generator
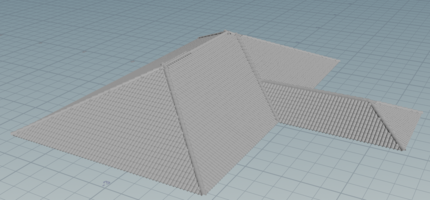
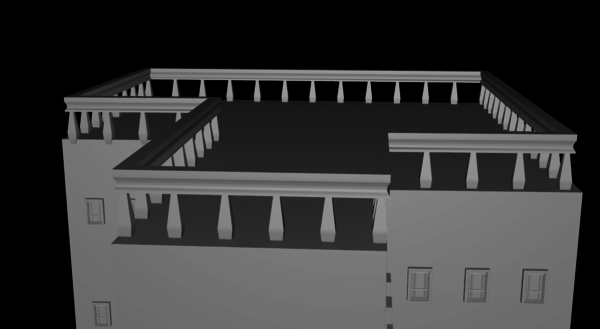
As we can observe, the most common roof type in Venice are the “hip roof” where all sides slope downwards to the walls without any vertical sides. There are also a few gable roofs and flat roofs. However, they are not that obvious at the first glance.
Hip roof
It’s said that hip roofs are more challenging to construct than gable roofs for they require advanced architecture knowledge. Fortunately, in Houdini, there is a built-in node called “PolyExpand2D” which can offset each vertex (not point) along the average direction of the adjacent edges. It is enough for locating the external corners and internal corners, by which ridges of the roofs can be generated. This node can build inside or outside geometry according to the given distance from a planar graph of connected polylines. With this convenient node, we can construct the hip roof by the following steps:
- Take the input of footprint and convert it to primitive type as base primitive. Resort the point number to clockwise order if needed.
- Generate inner edges for roof ridges, external corners, and internal corners by using the “PolyExpand2D” node. Create an “edgedist” vertex attribute with the distance of each vertex from the original polyline that generated it.
- Promote “edgedist” attribute from the vertex level to point level. Then lift the points according to the “edgedist” attribute. This step results in the base shape of the hip roof.
- Next we need to spread the tiles on each face of the roof. We follow the idea of sampling in texture coordinate, that is to say, we lay the roof tiles along the XZ plane as the “tile coordinate”, and transform each face of the roof to this coordinate. During this process, the transformation matrix needs to be stored. In this case, we use quaternion to do the rotation to avoid Gimbal Deadlock problem. Then, the boolean operation is executed to cut the extra parts of the marginal tiles. At last, we can rotate everything back using the invert of quaternion to put the roof face and tiles on it to the original position.
- Then it comes to the tiles on the ridges and external corners. Resample the filtered edges by a reasonable unit to generate target points of copying tiles. Note that internal corners can be obsoleted by the cross product of the adjacent edges.
Gable roof
The only difference between hip roofs and gable roofs is that triangular faces of gable roofs are vertical. So we need to eliminate the triangular faces and deform them to be vertical. Considering the issue that after deforming, the related points need to keep coplanarity as well as the points on adjacent faces, it’s just a matter of mathematics.
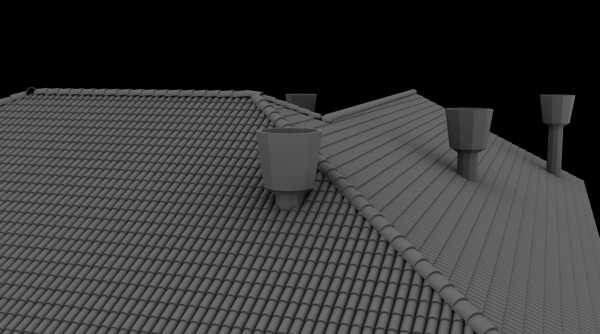
Roof details
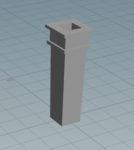
We used the 3D modeling software Maya to build some chimney models and exported the FBX file to Houdini. A certain density of points can be randomly generated on the plane of the roof of the house so that the chimney with the normal upward is assisted on the corresponding point.
Window generator
As the implementation of fences, glasses and shutters are quite straightforward, so we will focus on the arch generator in this part.
Arch generator
The elegant arches are generated by the designed geometry relationship. So it’s natural to think of utilizing the boolean operation to get the arches.
However, there is a significant problem to consider. Every modeling software treats a circle as a combination of multiple segments of straight lines. So if we use the boolean operation to calculate the intersection point of two tangent circles, we won’t get the expected result with high probability. Even if we subdivide the two circles many times, the boolean may do not work either due to the float precision. Besides, if we get the intersection finally, we will still be struggling with the point order issue which is vital for generating neat faces and correct normals.
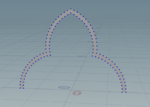
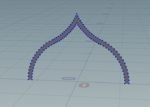
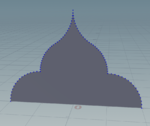
In a word, it’s necessary to control every detail by ourselves. We implemented a set of methods in vex code, which can calculate the position of the intersection, scatter points to a specific arc in both clockwise and anticlockwise directions, and form primitives accordingly. To generate a specific arch, we just need to figure out the intersections of circles, the start angles and end angles for each segment, and the direction for scattering. Please note that the inner shape and outer shape of an arch are not the same and thus they can’t be scaled or expanded to each other directly. It’s still necessary to write code to form the other shape.
Modeling using Maya
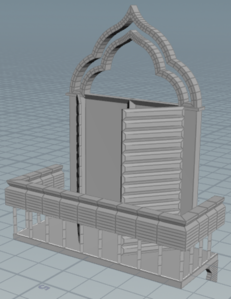
We also used the Maya modeling software to model the Venetian windows then import it into the Houdini engine. The advantage of this method is that it is relatively straightforward and we can use the Maya for complex window structures. However, the disadvantage is that there are not many variables that can be programmed and automatically controlled.
Venice city generator
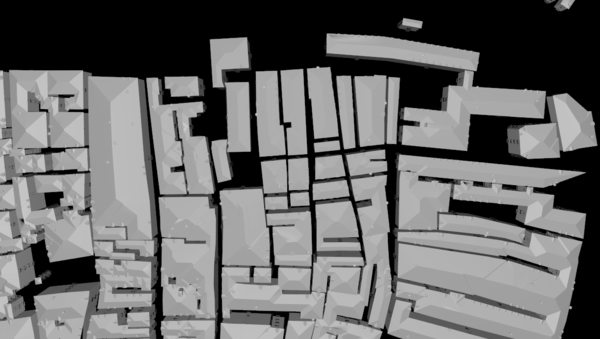
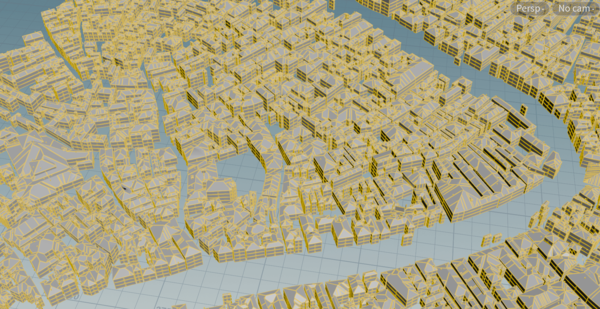
OpenStreetMap of Venice is used as a reference to pinpoint the location of every building. Using the sideFX Labs tools, the Venice city buildings' locations could be pinpointed in Houdini, and the street information and building inner parts are filtered using OSM filter node. Because there are some overlaps between different surfaces, so we add a boolean node and union the overlap surfaces.
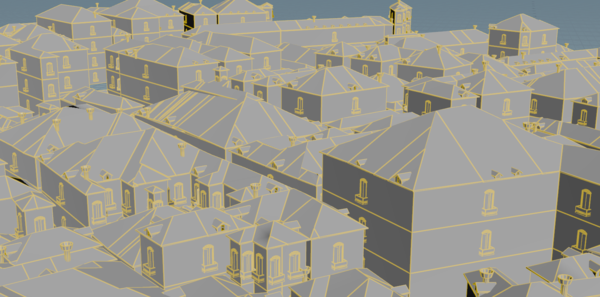
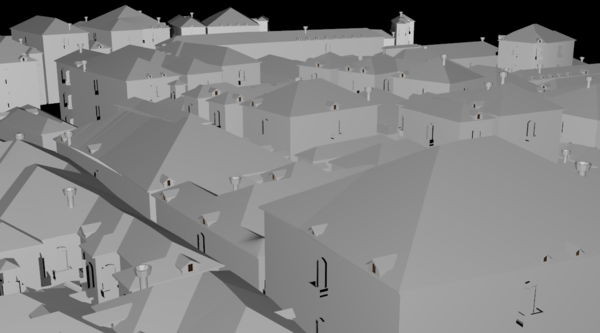
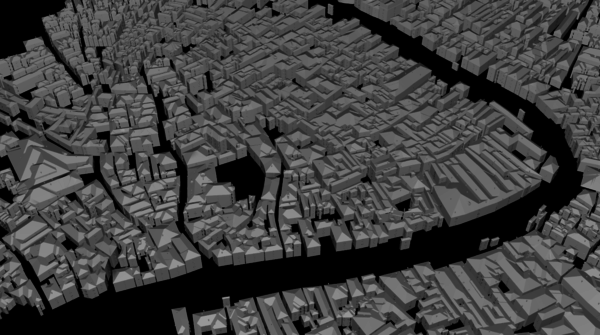
In this step, we connect the OSM data to our building generators. First, we traverse all OSM surfaces and use each OSM surface as the bottom surface to reconstruct the building generator. All OSM surfaces are separated into individual small surface, and a single building is generated on the small surface specifically, the height of the building and the height of the roof bottom are given the same random height.
Node handbook
This part provides the basic descriptions for important nodes and their parameters.
Building generator
Control the total number of floors, resample the footprint outline to decide the distribution of floors and windows, and provide basic information for adding accessories. The parameters are divided into three parts.
- Building options: Converts the footprint to a rough building shape.
| Parameter | Overview |
|---|---|
| Number of floors | Decides the number of floors. The max value is 10. |
| Default height | Controls the default height for each floor. If there is no overriding height for specific floors, it will be used as the floor height. |
| Default resample | Resamples the edges of the footprint by inner points and adjusts the width for every window unit. If there is no overriding resample value for specific floors, it will be used as the resample value. |
- Window options: Sets the concrete position of window units.
| Parameter | Overview |
|---|---|
| Default position | The vertical distance from the window bottom to the floor. If there is no overriding value for specific floors, it will be used as default. |
| Default window height | Default height of the window placeholders. This value may differ from the actual height of the window models. |
| Default window width | Default width of the window placeholders. This value may differ from the actual width of the window models. |
- Details: Applies overriding control over specific floors.
| Parameter | Overview |
|---|---|
| Floor index | The floor needs to be modified. |
| Height | Rewrites the height of the floors. |
| Resample length | Rewrites the resample value of the floors. |
| Window options - Position | Rewrites the window position of the floors. |
| Window options - Height | Rewrites the window height of the floors. |
| Window options - Width | Rewrites the window width of the floors. |
Roof generator
Constructs a hip/gable/flat roof by the given type and distributes tiles automatically. For the hip/gable roof, only external corners will be covered by tiles.
| Parameter | Overview |
|---|---|
| Expansion | Expands the footprint of the roof from the base footprints. |
| Roof type | Switches among hip/gable/flat roof types. |
Notice that it may take a while to generate a single hip or gable roof because of the boolean operation on tiles.
Fence generator
Creates a fence on the given polyline. This node is automatically called while generating the flat roof.
| Parameter | Overview |
|---|---|
| Resample | Controls the subdivision level of the pillars. Smaller value gives preciser controls over the pillar shapes. |
| Length | Controls the length of the pillars. |
| Common pillars | Controls the curve and thickness of the common pillars that are on the middle of polyline segments. |
| Special pillars | Controls the shapes of special pillars that are on the ends of polyline segments. |
| Fence | Controls the shapes of fence. |
Ledge generator
Creates continuous or separated ledges on the given polyline.
| Parameter | Overview |
|---|---|
| Type | Switches between continuous ledges and separated ledges. |
| Length | Controls the length of ledges in vertical direction. |
| Extrusion | Controls the length of ledges in horizontal direction. |
| Carve | Cuts the ledges from the give ratios. Only works for separated ledges. |
| Fence | Controls the shapes of fence. |
Ledge decoration generator
Creates uniformly distributed decorations under the roof. Most of the parameters can be found in fence generators.
Window generator
Creates a window by assembling the arch, shutters, glasses, and fence. It works if users only choose some of the components. The parameters are divided into three parts.
- Arch options: generates inflected ogee arch / two pointed trefoil / round trefoil / round trefoliated / pointed trefoil / pointed trefoil / two centered ogee arch / iris arch.
| Parameter | Overview |
|---|---|
| Arch type | Switches among 7 arch types. |
| Sample segments | Controls the number of points that are used to fit the each arc of the arch. Bigger value makes the arch smoother. |
| Expansion | Controls the distance between inner shape and outer shape. |
| Fill mode | Switches between “Fill” mode and “Hollow” mode. |
| Wire mode | Switches between “Wire” mode and “Face” mode. |
- Window options: Sets the concrete position of window units.
| Parameter | Overview |
|---|---|
| Height | Controls the height of the main body of windows. |
| Separation ratio | Controls the position of sliding windows. |
| Shutter options | Adjusts the rotation angles of the shutters and the distribution of leaves. |
- Fence options: most of the parameters can be found in fence generators.
Quality Assessment
Roof generator assessment
We have made two types of roof generators. For different shapes of ground, our roof generator can automatically generate the corresponding shape of the roof.
- It can be seen that for a single roof, the roof can be automatically covered with tiles if the amount of computer calculation allows. On the roof of Venice, there are tiles neatly arranged on the roof, but due to the age, some tiles have faded and some degree of damage has also appeared.
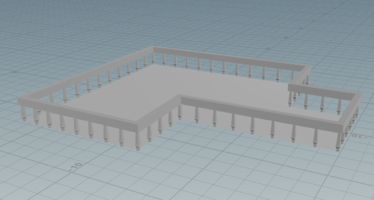
- Among the buildings in Venice, a very small part of the roofs (mostly on the riverside) are fence-style. You can compare the following two pictures. Our second roof generator restores this type of roof style.
- We can see that the roofs of Venice show irregular shapes. The roofs are vertical and inclined, but in our city generator, there are only inclined ones. That is because our vertical roof structure has some bugs when dealing with a large number of irregular models. So we commented it out temporarily. It can be seen that the effect of our roof generator results in fitting irregular roofs is very close to the real situation.
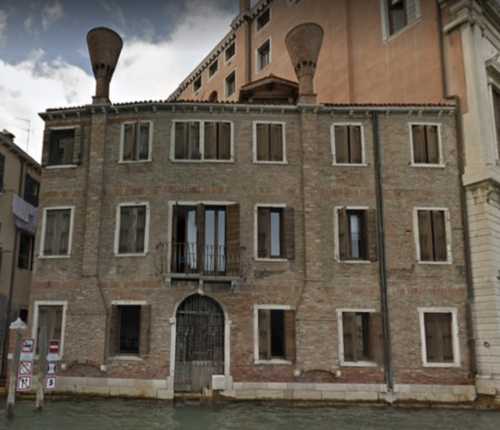
- We compared the top view of the roof near San Giacomo di Rialto in the real Venice with roofs generated by our roof generator, and found that from the top view, the shape and style of the roof are basically similar to the real Venice(the green box parts below). But if you look carefully, there will be some differences, for example, if there is an open space in the middle of the building, this area may be filled in the generated model(the red box below). At the same time, the roof will also have some randomly generated structures, just like the strange structures that would appear in real Venice.
Building generator assessment
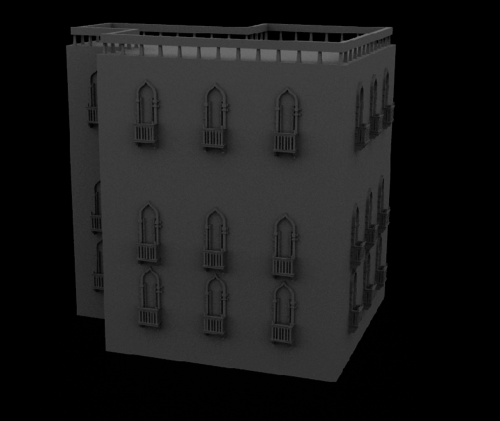
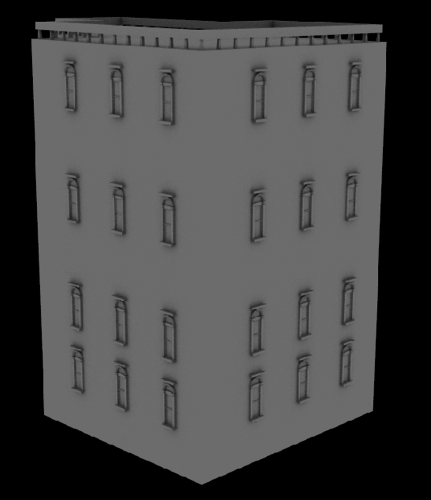
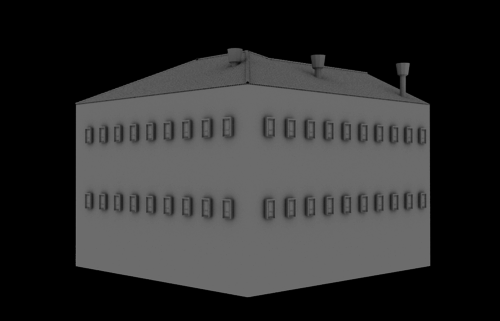
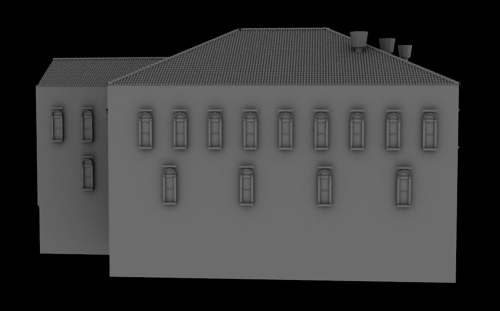
we used the building generator randomly generating two buildings for assessment, with different types of windows and roofs.
- For buildings near the river, there will be a small number of fence-type roof buildings. When classifying, we classify them as palaces. In our single building generator, this type of building can be reproduced well. The disadvantage is that there are still some details missing, such as flower pots outside the windows, corner decorations, etc., which can be attached to the building generator in the same way as windows.
- For simple buildings, which are also the buildings with the most in Venice, we can see that our randomly generated buildings can also reproduce this type of building. We can control the number of windows on each floor, the height of each floor, the total number of floors. However, it has the same drawbacks as the last one: in a real Venetian architecture, there will be many details, such as clothes poles, telephone poles, etc., which need to be constantly improved to look more real. Compared to the real Venice, our generated models are still too clean, too neat, and lack traces of years.
City generator assessment
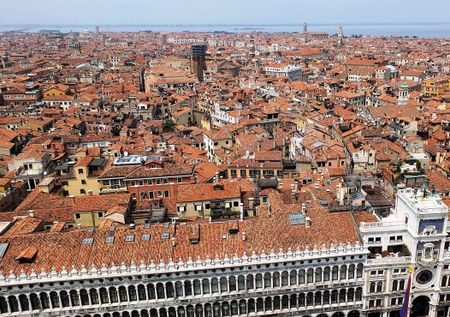
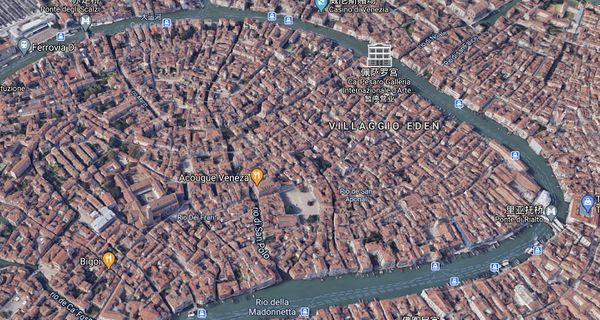
We used Houdini to generate 1,407 buildings in the central area of Venice. Compared with Google Maps 3D, from the perspective of a bird's-eye view, we can see that the generated city are very similar to Google 3D map.
Limitation
Running time limitation
For procedurally generated roof with tiles, if all building tiles in the city are generated procedurally, it will cost a lot of computing time and resources. For a tile, there are more than 10 faces, and it takes much time to generate a roof covered with such tiles using Houdini(with GTX1060). Our test city OSM scene has 153 building planes, which is quite small compared to the real size of Venice. If we generate all the roofs covered with tiles, then it will definitely take hours or even days. We think Applying UV mapping to the roof can be an alternative method to deal with the roof tiles.
Archetecture Precision limitation
At present, the procedural generation of Venetian buildings can only correspond to the bottom contour of the building. However, it cannot automatically match the number of building windows, window styles, roof shapes, and other factors of the buildings. We have not build a connection with data points or pictures of Venice, which is very difficult in Houdini engineer.
Dilapidated
We did not think about the dilapidated problem when we actually modeled. Actually, many tiles in Venice buildings are damaged, many walls are worn, many bricks are missing, and many chimneys are damaged. The houses we generated are too clean, too tidy, no clothesline, no flower baskets, no breath of life, and lack of traces of yeas.
Project Plan and Milestones
- Finished: Finshed as planed
- Delayed: Not finished as planed
- Changed: Replaced by other method or abandoned
| Date | Task |
|---|---|
| By Week 4 |
|
| By Week 5 |
|
| By Week 6 |
|
| By Week 8 |
|
| By Week 10 |
(We didn't use this method because we think it is difficult to make Venetian style building roof using this method) |
| By Week 11 |
|
| By Week 12 |
(Abandoned because we want to focus on Houdini modeling generator, importing to Unreal might face new conflict and Unreal5 which comes next year will be much more powerful than Unreal4) |
| By Week 13 |
(Abandoned because we do not import it into Unreal 4 Engine) |
| By Week 14 |
|
Github Link
References
Literatures
[1] Tavakkol, Sasan & Han, Feng & Mayer, Brandon & Phillips, Mark & Shahabi, Cyrus & Chiang, Yao-Yi & Kiveris, Raimondas. (2020). Kartta Labs: Collaborative Time Travel.
[2] Răzvan, Cristea. (2020). Procedural Generation of Architecture & Props.
[3] A history of world architecture (before the end of 19th century), in Chinese.
[4] Procedural Modeling of Buildings. Article in ACM Transactions on Graphics · July 2006
Tutorials
[1] CITY BUILDING WITH OSM DATA
[2] Houdini Procedural House Tutorial
[3] Houdini Procedural Simple House
[4] Mystic Tower
[5] SideFX Houdini - Beginner Series / Pumpkin Hell
[6] Procedural Props Modelling
[10] Level Builder

