Introduction & Motivation

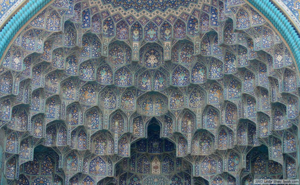
Example of Muqarnas structure
Muqarnas Definition
Muqarnas elements
Muqarnas Types
1. Simple Muqarnas: the ceilings have plane surfaces only
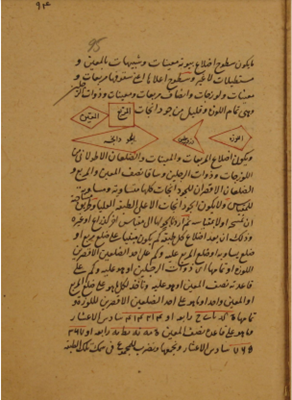
 Elements defined by Al Kashi |
[[]]
|
Methodology
Create the shapes in 2D
Transform the shapes in 3D
The Arc from the Method of Masons
The 3D Projection
Create the 2D plan and the 3D volume
- Step 1:
- Step 2:
In practice
Project Plan
| Date
|
Task
|
Completion
|
| By Week 3
|
- Choose three interesting project ideas.
- Prepare presentation slides for each project idea.
|
✓
|
| By Week 4
|
- Initial tutorial: Introduction to Rhino and Grasshopper.
|
✓
|
| By Week 5
|
- Rhino and Grasshopper applied exercises.
- Think of a definition of the context, content and outcome of the project.
|
✓
|
| By Week 6
|
- Grasshopper implementation of Islamic 2D star pattern
- Researching Abu al Wafaa al Buzjani's manuscript "On those geometric constructions that are necessary for a craftsman"
|
✓
|
| By Week 7
|
- Find the steps traditionally followed by craftsmen to construct muqarnas.
|
✓
|
| By Week 8
|
- Understand the construction methods described by Al Kashi's manuscript "Methods of the masons'.
- Identify different components used in Al Kashi's book to construct Muqarnas.
- Learn how to calculate the curvature coefficient for curved Muqarnas.
- Understand how to calculate muqarnas surfaces using Al Kashi's method.
- Implement the basic shapes in 2D.
|
✓
|
| By Week 9
|
- Work on the grasshopper 3D model.
- Parametrize the 2D basic shapes with a 3 point model, which will be useful to create the 2D plan.
- Model the 3D cells of each shape for simple Muqarnas.
|
✓
|
| By Week 10
|
- Midterm presentation: Prepare slides for the midterm project presentation.
- Layout steps to create 2D muqarnas plans in a procedural way.
|
✓
|
| By Week 11
|
- Complete the parametric 2D plan on Grasshopper.
- Identify the position of basic shapes on the plan.
- Identify the outline of each tier of the Muqarnas.
|
✓
|
| By Week 12
|
- Start applying the 3D shapes on the 2D plan of the model.
- Calculate the surface of the Muqarnas following Al Kashi's method.
- Compare the results to the surface calculated on Grasshopper.
|
✓
|
| By Week 13
|
- Final changes and fine tuning of the model.
- Implement curved muqarnas (only changing the arc is necessary).
- Complete the final report and wiki.
|
✓
|
| By Week 14
|
|
✓
|
Results
3D shapes
3D shapes with curve
2D Plan for Muqarnas model
Simple Muqarnas
Curved Muqarnas
Limitations
Future work
Github Repository
[1]
References
Literatures

